I shared this Watercolor Tutorial using
over on the CropStop blog today!
Distress Inks react wonderfully with water to
make some gorgeous looking images...
especially when paired with Watercolor Paper!
1. Gather your supplies - Distress Ink/Stamp/Watercolor Paper/Mini Mister 2. Start
at the top of your stamp and begin applying ink (I used 3 different
colors to create a blended effect - you can use as many or as few as you
like) 3. I like the mini distress inks because they're easier to work with in small spaces 4. Mist your stamp with water from the Mini Mister 5. Stamp
on watercolor paper (If you don't have water color paper you can use
regular cardstock - box six shows you the comparison) 6. Trim and create your card
For this card I used: Abandoned Coral, Fired Brick, & Aged Mahogany Distress Inks; Mini Misters; Watercolor Paper; Teastained Petitie Florals (Petaloo); Paprika (Teastained Red) Petaloo Lace; Circular Grid Anna Griffin Embossing Folder; Love is a Grand Thing (Stampin' Up); White/Black Cardstock
I made this next card to show you the difference the amount of water
makes. For the first card I spritzed it 3 or 4 times to create a deep,
well-blended effect. For this card I spritzed my inked stamp only 2
times for a lighter look.Supplies for this card: Abandoned Coral, Fired Brick, & Aged Mahogany Distress Inks; Mini Misters; Watercolor Paper; The border from Circular Grid Anna Griffin Embossing Folder; Love is a Grand Thing (Stampin' Up); Coral/Deep Red Cardstock; White/Black Cardstock
I want to share one more variation using the distress inks. For this card I inked my watercolor paper with Fired Brick distress ink and the misted it with water using the Mini Misters. Next I heat set it using my heat gun. After the paper was completely dry, I inked my Love stamp with Versamark Watermark ink and stamped it on the paper before adding black embossing powder and heat setting again. I layered the stamped piece on white cardstock cut with the Scalloped Square Nestabilities (Spellbinders) and layered it over a die cut from Creative Expressions (Petite Striplet - Jubilee). The black cardstock is embossed with the Circular Grid Anna Griffin Embossing Folder. 

Here's a side by side comparison for you: 1. Watercolor Paper vs. Regular Cardstock 2. Regular Cardstock with different ink colors and colored cardstock 3. Heavy on the water 4. Light on the water 5. Embossing over watercolor 6. One stamp 3 ways!
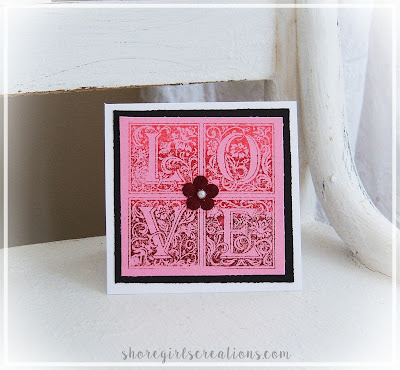
Before I sign off here's a simple mini square card I created
with that colored cardstock image,
a little velvet flower, and tiny pearl!
(Every card doesn't have to be a "masterpiece")
Before I sign off here's a simple mini square card I created
with that colored cardstock image,
a little velvet flower, and tiny pearl!
(Every card doesn't have to be a "masterpiece")
I hope you've enjoyed this little watercoloring tutorial! I'd love to see what you create with these techniques so stop by the CURRENT CHALLENGE and link up!
This post linked to:
4 Crafty Chicks (Watercolor),
Really Reasonable Ribbon (Red or Pink)
This post linked to:
4 Crafty Chicks (Watercolor),
Really Reasonable Ribbon (Red or Pink)


4 comments:
Beautiful job on all of these, I too love the distress inks for watercoloring, love the beautiful shades and results you got with the misting of the colors!
I loved seeing all the different effects you achieved with one stamp. Great cards! Thanks for joining us at Really Reasonable Ribbon for the Pink and/or Red Challenge! Happy Valentine's Day!
These are gorgeous! I love your how-to boxes and all the variations! So glad you linked up at Really Reasonable Ribbon so I could see these.
Gorgeous!!! I love that beautiful stamp and embossing folder!
Pam
scrap-n-sewgranny.blogspot.com
Post a Comment