Last week my daughter and I had so much fun making homemade paper out of scrap paper. You see...I'm one of those people who doesn't throw away my scraps of paper when I'm finished with a paper project....instead I save it all in a bin organized according to color.
You can see in this picture that my bin was overflowing with scraps and once I dumped it all out I realized some of those scraps weren't really all that usable. Some were extremely wrinkled (from being smashed in the bin), some were little bits of paper with shapes punched out (saved "just in case" I needed a small pink flower or a branch punched out) and still others were pieces of paper I really didn't care for any more.
After sorting it all out and tearing each "never gonna use" pile into small bits I had this:
The piles on the left of this photo are all cardstock piles organized according to color. The big pile on the right is my patterned paper scraps -- they'll be used much like you would recycle junk mail with patterns/colors on it.
And look -- I still had two bins of scraps left to use - albeit greatly reduced and a lot more organized!
O.K. now on to the actual paper making.....
I found this kit at a thrift store sometime last year (for $2.99 never been used), and it's been sitting in my craft room (gathering dust) up until now.
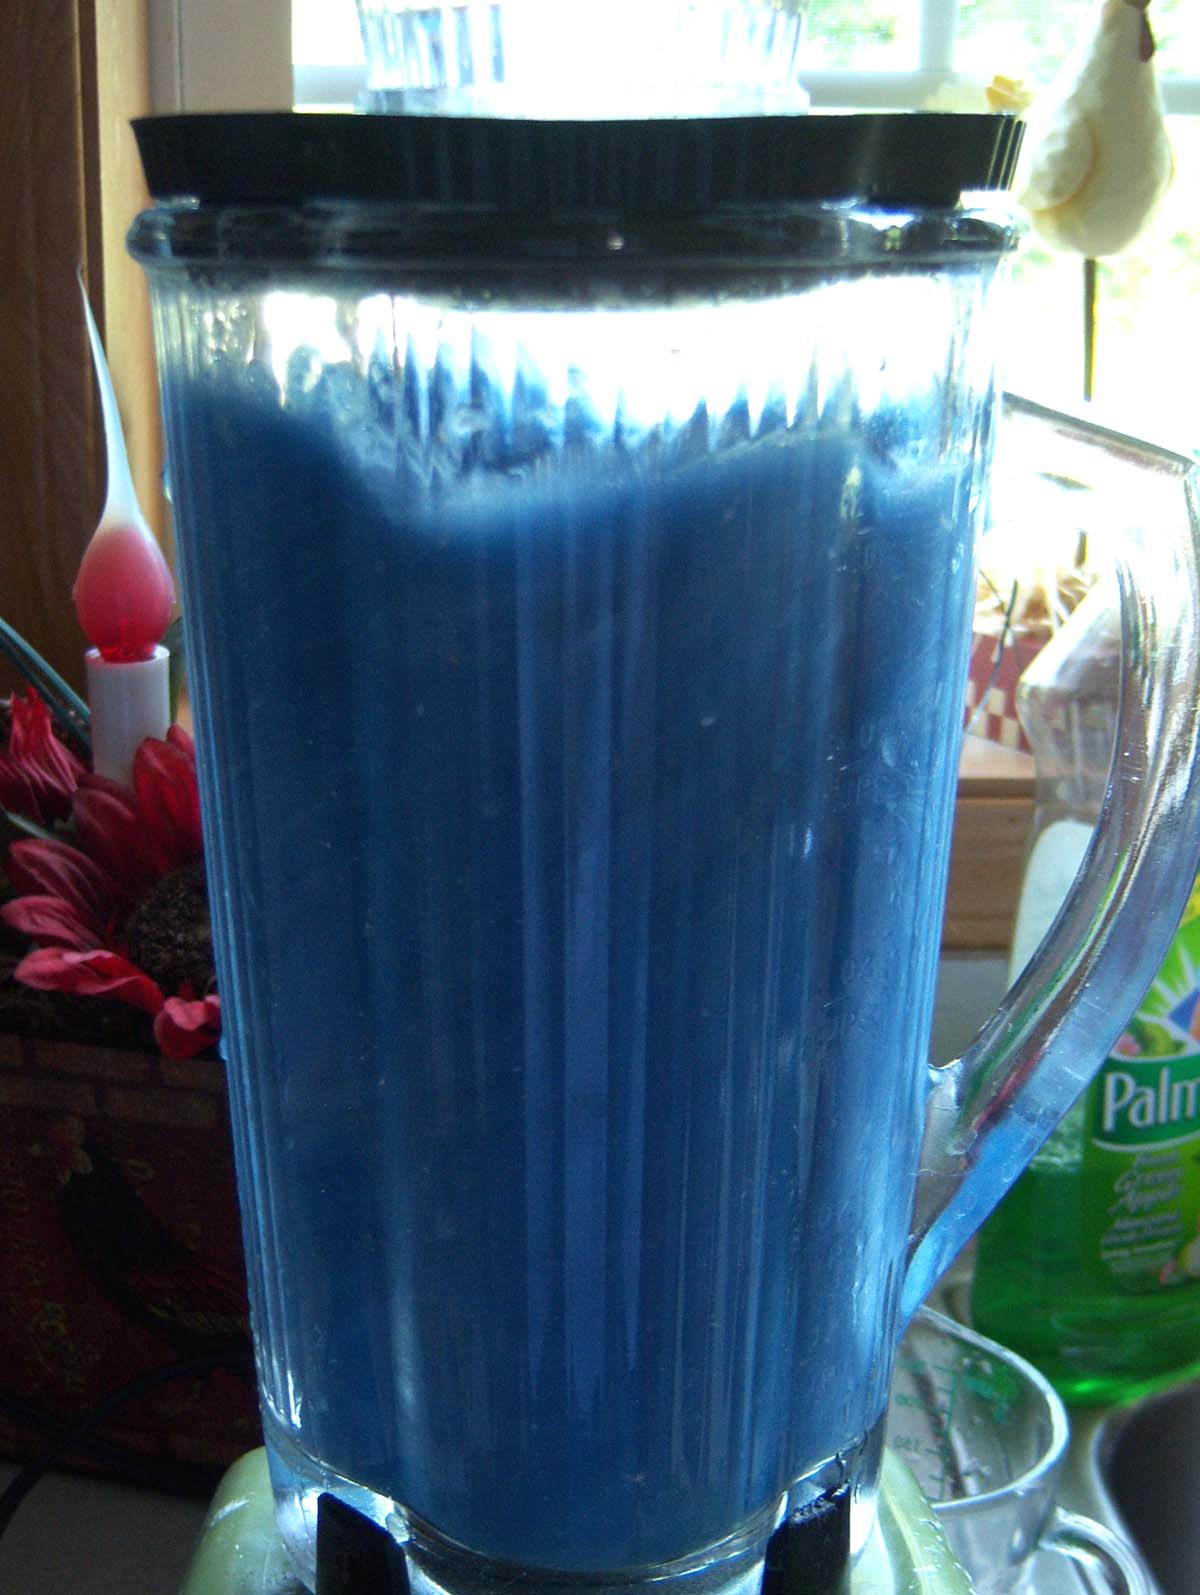
I started out by shredding some junk mail up and adding some dried flowers to it.....that's the paper you see to the far right in the above photo. (All the rest is cardstock)
After it's shredded you add some to your blender -- add water and blend!
You then pour this into a container (I used an under the bed rubber maid type container) and add more water to that. It takes about 2 to 3 blenders of pulp to get a good thickness to your paper.
I then put my screen in the water - pulled it up and the pulp sticks to the top.
My instructions say I can bake it in the oven for 20 minutes on 250 degrees (right on the screen) to speed up the drying process. OR you can let it air dry, but that can take up to 6 hours for one piece!
Remove the paper and dip the screen in the vat again for a new piece.
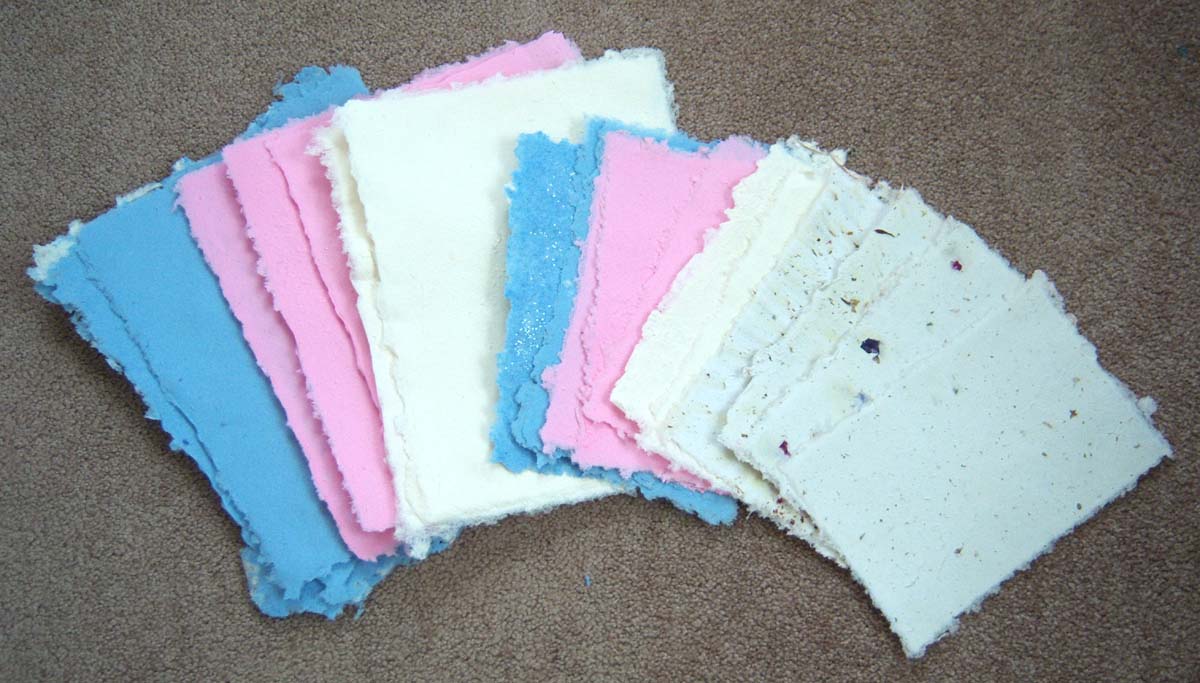
I think we managed about 18 pieces the day we made it -- the four on the right were made the night before. You'll notice that I only have three colors -- cream, blue, and pink! AND I still have some blue and pink paper scraps left. You get quite a bit of paper for as little as you put into it. It is a rather time consuming process, but I LOVE the feel of homemade paper and also like it that I'm not wasting all that leftover cardstock!
Here's a little closer view of the paper so you can see the texture of it -- I love it!
Here's a tutorial on making paper -- there seem to be several different ways to do it - I just followed the instructions in my kit.
I wouldn't mind to find another one for cheap just for the screens -- then I could make 4 pieces at once and really get things rolling!
Here's my first project using my homemade paper -- a decoration for the bulletin board for the month of August.
Supplies:
- Clipart from Scrapbook Studio (Hallmark)
- a disk I picked up at a thrift store for$1
- Homemade paper
- Brown Cardstsock
- Shells from our local beach
This post linked to:
Made With Love Monday
Craft Catwalk
Making Monday Marvelous
Tip Me Tuesday
Penny Pinching Party
T.G.I.F.