Thursday, July 30, 2009

Cuttlebug Challenge #44 --Sandcastle Scene

Here is my newest (for August) bulletin board decoration.
When I saw this sandcastle pattern in Family Fun, I knew I had to make something with it.
I wanted to make a card, but the pattern is too big and I haven't had a chance to re-size it yet.
Then I realized Saturday starts August, and I needed a new decoration for our bulletin board.
What better end of the summer thing is there than a beach/sandcastle?
Since it's for the church bulletin board the flag reads "Rejoice in the Lord alway: and again I say, Rejoice." Philippians 4:4

Details of the bucket

Details of the sun, clouds, bird

Supplies: Paper
  • 1 Sheet of paper I purchased at Dollar Tree some time back (the background)
  • 1 Sheet of sandy looking paper (the sand at the bottom)
  • Blue card stock
  • Red card stock
  • Gray card stock
  • Yellow card stock
  • Orange card stock
  • 50 grit sand paper (the castle)
Inks (all but the black ink pad used in inking edges)
  • Blue ink pad (on bucket)
  • Red ink pad (on bucket)
  • Silver ink pad (on bucket)
  • Orange ink pad (on sun)
  • Yellow ink pad (on sun)
  • Light blue ink pad (on waves)
  • Brown ink pad (on flag)
  • Black ink pad
  • Bic Markers
Misc. materials
  • Soft Pastels (Oriental Trading) ---clouds
  • Transparent embossing powder
  • Art Accentz laser glitter - minerals light copper
  • Paradise bird stamp
  • Sea Shell Clip Art (the same shell and technique I used in this post, just shrunk it way down)
Cuttlebug
  • Polka dot embossing folder (sun)
  • Swirls embossing folder (bucket)
Paper Piecing Patterns

Wednesday, July 29, 2009

Cut-Away Cards

Had an hour or so last night to sit down and scrap (from 8:30 - 9:30). Here are the cards I turned out in that space of time. They were inspired by a card I saw in Susan Cobb's book (again). They're all three the same with just a few minor differences.
Different colors of ribbon, different brads, different color card stock (one of them), and a different sentiment inside.


The inside of two cards:


Supplies:
  • Green/pink card stock
  • 3 different sheets K & Company (K-ology) Hannah Scrap Pad
  • Cuttlebug embossing folder/die cut - butterfly
  • Studio G Ribbon
  • Paper Pizazz - Easy Stitches Template (from Paper Wishes)
  • Brown Ink Pad (inked edges)
  • Misc. Brads

"Paper Engineering"

Here is a card I made last year using a fancy fold (bouquet holder) from page 36 of Susan's Journal of Paper Engineering Secrets. (My husband surprised me with this book at Christmas time, and I LOVE it!)
The book includes patterns/diagrams for each "secret," and features:
  • Fancy Folds
  • Flaps
  • Jackets
  • Nested motifs
  • Closures
  • Pop-ups
  • Clever Cuts
  • Fun with vellum
  • Envelopes
  • Windows
  • Cutaways
  • & more


Card open

Another card I made using the waterfall fold from the book.

Tuesday, July 28, 2009

Pink and Orange

Inspired by this card (and the way she used pink/orange together - stamping the tree there times in different colors)...

...I made the following two cards


Supplies:
  • 1 Sheet DCWV "everyday" stack
  • orange/pink/white card stock
  • versa color stamps
  • Autumn Leaves Clear Stamps - Flowers
  • Studio G "With Love"
  • BasicBasic orange/pink ribbon
  • White photo corners
  • Black Felt Tip Pen to make "messy" border

Monday, July 27, 2009

Uncluttered Backgrounds

Just recently I learned the secret to posting cards with uncluttered backgrounds. Probably most of you have known this for a long time, but just in case someone is new to blogging (like me).... here is the link to my friend's blog and explanation.


Here is my take on it without purchasing anything to do it with.
  • select two pieces of coordinating card stock
  • lay one piece on a flat surface
  • prop the second piece on top to form a background
  • place you card in the center
  • zoom in and snap your photo
I like to use natural lighting and no flash as sometimes the flash creates a glare on the card or washes out the colors.

Since I enjoy experimenting with things, I tried using two different colors of card stock, rather than just one. I like it even better! Here's the finished product.

Butterfly - Crochet Flower

Another card from the archives...

Supplies:
  • brown paper (my husband brought it home from the hardware store...it was the lining in the paint can box)
  • crocheted red flower
  • red/black music paper (butterfly)
  • green paper (leaves)
  • green, red, gold glitter
  • black flocking (the butterfly trail)
  • butterfly word stamp from All Nights Media - Rubber Stamp Poet
I made the flower using a pattern from here.

Saturday, July 25, 2009

Blues


Since I've been too busy to spend a lot of time making cards of late....thought I'd pull one out of the archives to showcase. This is a very simple card, but one my favorites!

Supplies:
  • cream cardstock
  • Julep Floral stamp (Hampton Art)
  • 3 different sheets of DCWV - Nana's Nursery
  • corner punch
  • pale blue ribbon

I'm a Crafter NOT a Carpenter!

For a long time now I've been wanting a set of shelves to put my stamps on.
Several reasons:
  1. I could get to them easier
  2. I could actually SEE what all I have and maybe use it more
  3. Nora's shop (in PA) is one of the cosiest places a stamper could go and I'd like the same feeling here (I'll have to make all my walls look like this to get the same effect!)
  4. Etc. Etc. Etc.
The stamps have been in sliding drawers for as long as I've owned them, but last night they got a new home....behind my craft room door you'll find.....

Now you have to realize that I'm a crafter NOT a carpenter, so these shelves are not perfect. I'm sure my carpenter brothers would think their little sister's creation is atrocious, but it serves the purpose!
Wow! I didn't know I had that many stamps! Now I feel the need to clarify that I didn't buy these at full price. They were purchased:
  1. From Big Lots for $1 (the same stamps were selling at Michaels for $8, $10, $16 etc)
  2. From Dollar Tree for $1
  3. From Ollies for $2.99 (I got several sets that way)
  4. From the Thrift Store for 50 cents, $1, $2, $3 (depending on which set it was I bought there)
  5. From a crafts store's clearance bin
  6. From a craft store (Michael's, JoAnns, A.C. Moore) with a 50% off coupon
  7. From a won box lot (off ebay)
  8. As a gift and given to me
I'm always looking for a good deal, and over the past few years you can see I've found quite a few!
Less you think the shelves are full and I can't handle any more........
....there is still room for expansion! Not all the shelves are double stacked with stamps in back and in front.
Here is what I did with the clear stamps:

I'm really enjoyed looking at all my stamps....can't wait to get time to use some of them.
Come on over and we'll stamp a while!

Friday, July 24, 2009

Black and White and ...

......PINK

......TEAL

......RED


Supplies:
  • White Cardstock
  • Me and My Big Ideas Paper
  • Martha Stewart Dove White Ribbon
  • Cuttlebug Butterflies
  • Bic Markers
  • Studio G clear stamp "sending my love"
  • Tiffany Teal Iced Got Flowers
  • Art Accentz laser glitter
  • Misc. Florals
I LOVE black and white anything, and especially like it when there is just a touch of another color with it. This paper was so pretty it didn't need much added to it. Sometimes simple is nice.
(By the way that black and white paper is flocked, so it's "fun" to feel too!)

Thursday, July 23, 2009

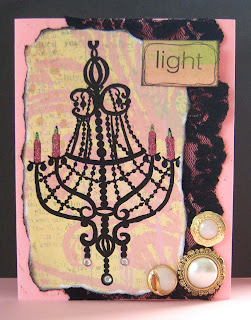
Chandelier Cards

Thanks to a very nice lady for sharing this image with me.....you can get one too by emailing her at (deb@mustangsinblack.com.au) or visit her blog......http://www.papertreedesign.blogspot.com/)....I made these three cards with one of my favorite things....chandeliers!


I used extra fine pink glitter on the candles, and extra fine yellow on the flames.
Also added three little rhinestones on the bottom of the chandelier.

Wednesday, July 22, 2009

Altered Note Book

We're having a missionary for our Thursday night service this week.
As part of her welcome gift I altered a note book. Here are the before and after pictures:

Tuesday, July 21, 2009

Notebook Paper

Tried a little experiment with regular notebook paper and some stamps.
I layered some floral vines/flowers in different colors on the paper, stamped the sentiment, and drew messy lines around the paper for a border.
Using pink card stock as the base, I smeared my red ink pad around the edges. Also smeared the edges of the notebook paper with ink.
Attached the paper to the card base and added a homemade flower with button center.

Monday, July 20, 2009

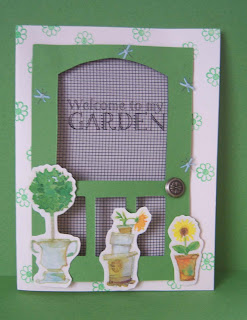
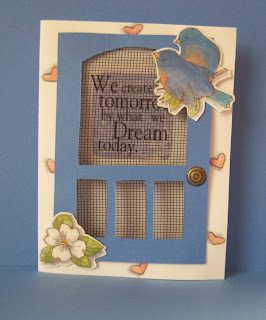
Screen Door Cards

Since I've been preparing for/entertaining company for the past week, I've not been doing many paper crafts.
After cleaning, doing laundry, and getting the house in order today; I sat down to do a little cardmaking.
Mom brought me the August/September 2009 Country Woman because it had a craft in it she knew I would love.........it's simply "A Door-able!"
That is what I chose to make today.....here's the photos:
(For some reason the photos make the doors look a bit bent, they aren't in real life)


The inside of a card looks like this....


Being that my husband works part time at a hardware store I was able to get a LARGE piece of screen for free. It just so happened that the day I ask him to buy me a piece there, one of the other employees messed up when recovering a window. Wayne saw this big piece of screen in the trash can and ask the boss if I could have it.

I checked the Country Woman website to see if there was a pattern to share, but there wasn't. Since it is a current issue there is still time to buy one, or it would be fairly easy to draw one as most of the openings are made of straight lines.
Of course if you live nearby I'll let you trace mine if you're interested!

Saturday, July 11, 2009

Time


Here's a card from the archives.
I love cards that have clocks (of one sort or another) on them. I got a set of clear clock stamps for $4.98 from Paper Wishes some time back. The clock hands are stamped and then covered in extra fine glitter.....a flower brad holds them in place
I used a quote from a Tim Holtz set I have. The background is embossed with the polka dots embossing folder and then blue ink rubbed over it to make it "pop." The lace is made with the Martha Stewart lace punch.
The color combination is one of my favorites....light blue and white.

Thursday, July 9, 2009

Cards by a six year old

Makayla has always loved to make things along with mommy, and is very good with her hands. (She's been using big scissors since she was two and has NEVER had any mishaps with them.) She usually joins me when I'm in the craft room, and creates her own unique cards etc.
I thought these there cards were especially nice for a 6 year old. She came up with them on her own, and used the sizzix alphabet to cut out and spell "HI" on the one card. (She'll be impressed that mommy posted them on her blog.)


Mini Cards

I saw a set of mini envelope cards and tags at Michaels the other day. They were from K & Company, and I LOVED them. So here is my take on them.
Both of them look the same when shut (shape wise), but the first opens and second is glued together to form and envelope. Here's the 1st one....

The 2cd one with the tag card in it..... This one I had lots of fun with....I used my small flower punch to line the whole punched for ribbon.
Here is a photo that includes the front and back of the tag.


On both I used double sided paper for both the envelopes and tags. I made lines for writing 1/2 inch a part, and used my corner stamps on two corners. Used my scallop scissors on the top edge of the 1)card 2)envelope.
Here are the punches I used in making the flowers on the red set...

Wednesday, July 8, 2009

More of the sea theme

This card inspired me to make the cards pictures below

I used a coloring page from
here, sized it [by right clicking/copying/pasting in Microsoft Office] and colored it with my bic markers.
I then applied Versa Mark to the image and covered it with Kaleidoscope transparent embossing powder. Matted the shells in blue and light tan.
The background was stamped with a sea shell from By the Sea Sentiments (MSE) in brown and blue. Sentiment from the same set.
Here is an up close of the shell you can see how it sparkles!

The Sea


My Sentiments Exactly....By The Sea Sentiments Clear Stamp set.
I made 10 cards using this set when my sister in law was down a while back. I've used all of them except these three. I did two each of these designs: a sea shell, a sea horse, a starfish, a lighthouse, and a dolphin. Most sets I made one vertical and one horizontal. I LOVE this set of stamps, and will use them over and over. I am always looking for new sea themed card supplies since I live right near the sea. They make such nice welcome cards for guest we have.


This last card is my "copy" of the card found here. I used my new alphabet die cuts on it, and added extra fine glitter to certain areas. This was a fun card to make, once again......love the sea theme....especially for summer!

Tuesday, July 7, 2009

Using Glitter


A card for my neice Carli whose birthday is today! Hello Kitty with glitter added to certain parts of her image. She is a coloring page colored with Bic markers.